
Three Helpful Storyline Software Tricks
Learning software at first can be tricky. The authoring company usually provides videos, an online support community, and sometimes live support, but nothing beats experience.
As we learn different tools, we sometimes discover time-saving methods or tricks that can enable us to perform a task more efficiently. So here are three, non-standard tricks I have learned as my experience with Storyline has deepened through the years.
Hotspots
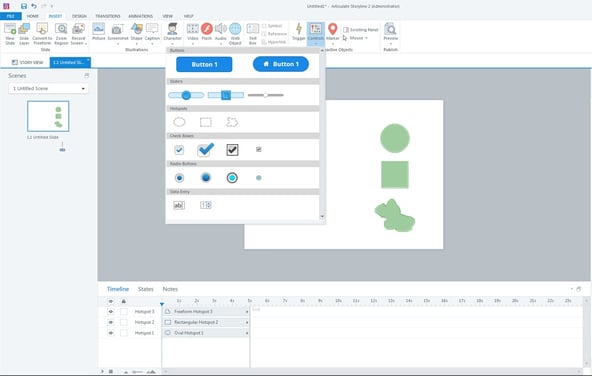
First up is a little trick with Hotspots. In Storyline, hotspots are invisible shapes that can be used in place of buttons, among other things (more on that later). They are found under “Controls” on the “Insert” tab on the ribbon, right below the buttons. You can create a circle, square, or get creative with a freehand shape.
When you draw them out, they show up as semi-transparent shapes, but when you publish the course, they will be completely invisible. These invisible shapes are great for behind-the-scenes functions. You can use them in place of buttons, as targets for drag-and-drop interactions, or put them over images for interactivity.
Now for the trick: you can also use them to block other interactive elements until they are needed. For example, let’s say you have set up 6 hotspots over images that will branch to different screens. You don’t want the student to be able to click on those hotspots until the audio narration has finished giving them instructions.
You could spend the time adjusting all 6 hotspots individually to appear on the timeline after the narration has finished; that’s a perfectly good solution. Or you could add one hotspot on a layer above to block them until the narration ends, so you would only need to adjust one layer on the timeline instead of 6!
Slide Master
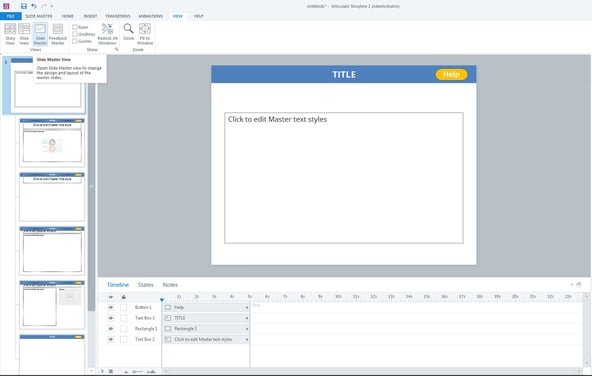
Slide Masters are often used as a design template such as in PowerPoint. They are great for setting up a default design theme that can be instantly applied across multiple slides instead of having to set up each slide individually. If you are familiar with applications that use page templates, like PowerPoint, you probably already understand how much time they can save.
Now for the trick: you can also use Slide Masters as function templates, which is quite a nice trick. What do I mean by that? You can use them to set up a custom interface with buttons and triggers on a master slide, and then apply that master slide to multiple screens.
The buttons and triggers from the master screen will then work on each screen in which they are applied. For example, if you want a custom “Help” button that will allow the user to go to a screen with information about how to navigate the course, you would create that button on a Slide Master (along with all the proper design elements for the course) and then apply it to all the screens in the course that need it.
This is an amazing time saver! Plus, if there are future edits to the interactive elements, instead of having to edit buttons across several screens, you only need to change it on the master slide. The edit will then be applied to all the slides that use the template.
Animation Combination
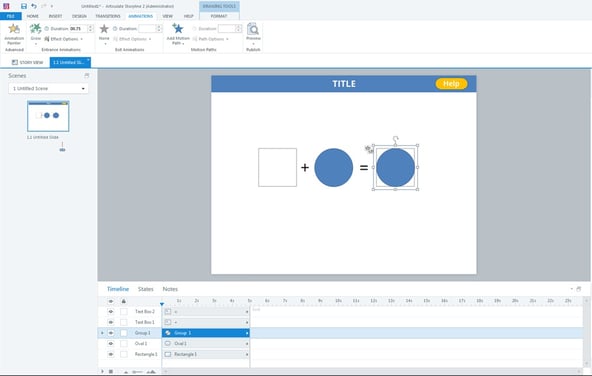
This last trick is a way to combine multiple animations. Normally you can only choose one type of animation per object. For example, if you have some text or a shape you want to animate, you can either have it fade in or scale it up, but you cannot do both.
Now for the trick: the trick here is to add an animation to an object, then group it with another null object, and lastly add a second animation. But first, what is a null object? A null object is, like the name suggests, an invisible object. Before you go looking, there is no option to make a null object in Storyline. You create it on your own. Don’t worry; it’s easy to do.
First, you need the actual visible object you want to animate. It can be anything you can regularly animate, such as text, shapes, and images. Once you have created a new shape, this will be the null object. Select the shape, go to the shape’s format options, and set so it has “No Fill” and “No Line.” The shape will not be visible when published. Congratulations, you just made a null object in Storyline!
I recommend aligning the null object with the item you want to animate using the Align Tools. Now you can add an animation to the visible object, group it with the null object, and then add another animation. For example, you can add a “Fade” to the visible object, group it with the null, and add a “Grow” to the new group. When published, the visible object will fade onto the screen as it grows.
I hope you enjoy these Storyline tricks! For more information on how Judge Learning can help with any of your learning needs, please click on the button below.
Related Blogs
From AI Policy to Business Value: Why Responsible AI Must Drive Measurable ROI
Over the past year, organizations have made significant strides in defining AI policies, governance models, and ethical frameworks. These efforts are critical but they are not the destination. Responsible AI should not be viewed as the endpoint. It is…

Beyond Salary: The Compensation Levers That Matter Most in 2026
When it comes to evaluating job offers for physicians, base salary gets most of the attention, and that makes sense! It’s the headline number, and every other piece of the package gets measured against it. But it’s also the number where employers, especially large health…

Where Advanced Practice Clinician Demand Is Growing Fastest in 2026 and What That Means for Your Next Move
Advanced practice clinicians (APCs) have been told for years that the job market is in their favor, and the numbers back that up. The U.S. Bureau of Labor Statistics projects employment for nurse practitioners (NPs), certified registered nurse anesthetists…